image_pdfimage_print

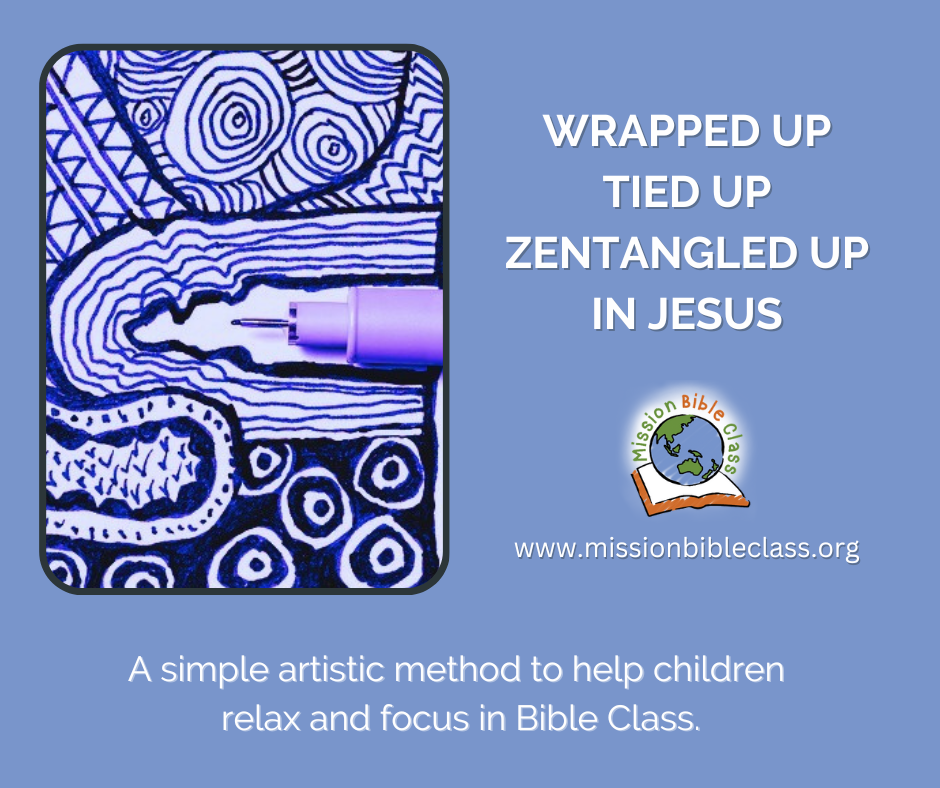
Wrapped Up, Tied Up and Zentangled Up in Jesus

Recently a group of children got me tangled up in something new.

I was teaching a small group of 9-12 year olds on Sunday mornings for Bible class.  I asked the children what ideas they had for helping us learn.   Their suggestions are what led us to begin “tangling” in Bible Class.

I had first been introduced to the idea quite some time ago but I had not thought of using it for my Bible class.  After learning a bit more about it I realised that the children were “on to something”.

Zentangle is a method of drawing that is so simple and repetetive that it frees your mind up to relax and focus. Doodling is more freeform and flowing but Zentangle usually follows patterns.

Don’t make the same mistake I did and think that Zentangle is somehow related to “Zen Buddhism”.   As I learned more I found out that it is actually an artistic method created by Rick Roberts and Maria Thomas.  They describe the actual process of drawing “tangling”.  They added the word “zen” to describe the calm effect tangling produces as you do it.
You can read more about how it began here.

How We Tangled in Our Class

Since we working our way through some great Old Testament lessons from the Tower of Babel all they way through the Life of Joseph I wanted to emphasise “FAITH”

Abraham, Isaac, Jacob and Joseph had great faith.

Here’s What We Did

  1. Prepared a Poster:
    The children could have draw their own letters but, for this first attempt, I decided to pre-print the word FAITH on a paper using big letter outlines.  I searched for a suitable font and found one similar to Janda Manitee Bubble .  Create your own or use this one in A4 size or this one in letter size (USA)
  2. Drew a free-flowing grid to create drawing spaces:
    The tangle designs can be done inside the letters or outside, in the white space.  I decided to go with the white space outside the letters.
    To help the children get started I went ahead and drew out a wavy sort of grid so they would immediately see the small areas to add designs to. By doing this free-hand I was able to create a totally unique pattern for each child.
  3. Provided each child with a pen:
    People take Zentangling to all sorts of levels and spend lots of money on special paper and pens.  In our case I just handed each child a fine line black pen.  We used fine line Sharpee pens.
  4. Started tangling:
    Each child selected a FAITH poster and began filling each of the “squares” with a unique design. As we all “tangled” we talked about faith. We weren’t about finishing the project by the end of class.  We just set them aside to be picked up and continued the next time we met.

What I learned about using Zentangle in Bible class

  1. Amazingly, this method really did bring calm to the classroom.
  2. Fidgeters stopped fidgetting and were able to draw and participate in conversation all at the same time.
  3. The conversation while tangling flowed naturally.  The children were relaxed and calm and just chatted about what faith meant in their lives and then about life in general. Even shy children contributed to the conversation since they did not feel undo attention was on them.
  4. I provided some patterns that I found online but the children in my class were quite happy to come up with their own designs.

Links to Videos and Patterns:

I wasn’t concerned with following strict guidelines for Zentanglel so I was able to find lots of patterns and examples online.  A simple online search for “zentangle” will lead you to a number of different examples.  Here are a few simple ones that I found.

And just for fun I’ll leave you with the song that I couldn’t get out of my head while writing this post!!

Lyrics:

I’m all wrapped up, all tied up, all tangled up in Jesus.
I’m all wrapped up, all tied up, all tangled up in God.
I’m all wrapped up, all tied up, all tangled up in Jesus.
I’m all wrapped up, all tied up, all tangled up in God.

Marble Painting a Burning Bush

Marble Painting Complete

The children in our mixed-aged Bible class last Sunday created some awesome pictures using marbles and paints.  The lesson for the day was about when the Lord spoke to Moses from a Burning Bush 

We talked about how God was concerned about the suffering of his people and was giving Moses the important job of rescuing them.  After the lesson we gathered our supplies and made these lovely pictures.  Younger children needed more help and the older ones were able to do each step on their own.  Of course, the best part was being able to chat about the story as we worked on the craft!

Supplies

  • A baking pan or shallow box with sides (one for each child or take turns)
  • A large paper cut to the size of the bottom of the pan or box
  • Crayons
  • Paints in fire colours like red, yellow, orange, brown and black (tempera or acrylic works well)
  • Marbles (heavy ones work better and we had 3 per child)
  • Tape
  • Damp paper towels or items of choice for clean-up

Method

  1. Children draw a free-style bush on the paper using the crayons.  This is the best time to write names or titles on the drawings, too.
  2. Place the paper in the tray and secure the edges with a few pieces of tape.
  3. Sparingly dot the paper with various colours of paint (thick globs don’t work).
  4. Place the marbles on the surface of the paper and move the trays around slowly in a rolling or gentle wave-like motion.  As the marbles roll around they will pick up paint and distribute it over the paper.
  5. Remove the marbles and hang the pictures to dry.

Other Stories for this Craft

Use this same method and different colours of paint to create effects.  Generally, the student will draw the main picture and then use the paints to create the effect.  Alternatively, you could provide a printed colour sheet and then have the children create the paint effect over it.

  • Wind using white and a little black on gray paper.
    • Sermon at Pentecost  (Draw the people or steps of the colonnade and then create the wind with paint)
  • Mood or Feeling using multi-colours on coloured or black paper.  This is more abstract but can be very effective.
  • Plants using green and a few dots for flowers.
  • Light using white or light yellow on black paper.  Fill the page with the colours of light.  Add some glow in the dark paint for fun.
  • Fire and Brimstone using red, yellow, orange or just use yellow and white with a little red to highlight the brimstone.  Draw the city first and then create fire and brimstone with paint.
  • Hair using brown or black.  Draw Samson’s face first and then create the hair with paint.

How to Use on Any Story

Create a frame around any verse or picture by taping a paper over the centre of the paper (where the words are written) and only leave a blank space around the edges of the paper exposed.  Once the painting is complete then remove the paper.

Marble Painting Pin


Walking and Jumping and Praising God!

Healing Lame Man Craft (2)

The Healing of a Man Who Could Not Walk

What an amazing Bible story!  A disabled man well known for begging.   Two apostles who responded to the beggar by giving him much more that money.  A man who could now walk because of the healing power of Jesus Christ.

Children can really relate to expressing excitement in the same way that this man did.  He praised God while walking and jumping in front of everyone.  Of course we had to practice this for a while in our class this past Sunday.

We also used our feet to express praise.  First, we wrote “Praise God” on the centre of a piece of paper.  Then we used our toes to paint.

It was messy.  It was joyful. And it allowed the children to relate to the feelings the man had and to express praise with even the most humble of instruments…toes.

Oh, for this exuberance in accepting God’s power in my life!

But Peter said, “I don’t have any silver or gold, but I do have something else I can give you: By the power of Jesus Christ from Nazareth—stand up and walk!”

Then Peter took the man’s right hand and lifted him up. Immediately the man’s feet and ankles became strong. He jumped up, stood on his feet, and began to walk. He went into the Temple with them, walking and jumping, and praising God.

All the people recognized him. They knew he was the crippled man who always sat by the Beautiful Gate begging for money. Now they saw this same man walking and praising God. The people were amazed. They could not understand how this could happen.

Acts 3:6-10, International Children’s Bible


Healing Lame Man Craft (1)

Who Took My Jesus?

Burial and Resurrection Craft

In two Wednesday evening bible classes I taught a group of children about the Burial and Resurrection of Jesus.

The death, burial and resurrection of Jesus Christ is the most important story a child will ever hear because it is the core of the Gospel.  If it was not for the sacrificial death of Jesus and his resurrection from the dead none of us could receive forgiveness of sins and a relationship with God.  (see I Corinthians 15:1-5)

To help the children experience this story I chose a craft as an activity.  If a teacher chooses an appropriate and meaningful craft then the time spent making it can be used the time to “chat” or talk about what the bible says happened.

The children were given paper plates, paper and toilet tissue to make their own tomb, body and stone to re-enact the story.

The Tomb:

We cut a paper plate in half and cut out a “door” on one of the halves.  We painted one side of the plate black and the other grey to resemble the stone tomb.  Then we used staples to attach the edges together (see photo above).
As we made the tombs we talked about how Joseph of Arimathea arranged for the burial (John 19:38-42)

The Body:

We cut a simple outline of a body from cardboard.  Then we wrapped the body with a couple of layers of toilet paper.  After this first layer of toilet paper we then sprayed it lightly with water to dampen it.  (I supplied a spray bottle filled with water to make this easy)  Then we added a second layer of toilet paper and sprayed it. To add a scent like the spices we dapped on a little perfume.  We repeated this with a few layers until the damp (but not soggy) shape resembled a linen-wrapped body.  When this dried all of toilet paper remained stuck together.
Again, we continued the discussion (from the Scripture above) about burial customs and how they wrapped bodies in linen and placed spices in between the cloths.

The Stone:

This was simple to make by crumpling up paper into a ball.
As we made the stones we talked about how this big stone was put in place and guards placed over it (see Matthew 27:57-66)

At this point each child placed their tomb on a table and put the body inside.  Each carefully rolled the stone in place.  Because everything was still a bit damp we decided to leave them in the classroom until the next week.

The Resurrection!

Just before class the next week I went into the room and removed the “body” from each tomb and put it away.  Then I waited.  Just as I predicted, one by one the children arrived and went straight to the tomb they had created and moved the stone to look inside.  Each one found the tomb empty.  One child said, “Oh, no!  Who took my Jesus?”

Of course I told returned the bodies I had hidden but their reaction to an empty tomb was the perfect way to begin the class and talk about the resurrection.  The children got to experience the same emotions as the soldiers, the women and the apostles as they each found the tomb empty.  Mary Magdelene used almost the same words (verse 13) as the children when she said, “They have taken my Lord away…and I don’t know where they have put him.” (John 20:1-18).

This was a great class!

Note: You could teach this story in one lesson but you will need to distract the children while a helper removes the bodies from the tombs.

R-E-S-P-E-C-T

Respect Sign

During a planning meeting for a holiday program I challenged the group to define the word “respect”.  At first it seemed like it would be a simple thing to do.  We seemed to have no problem coming up with scenarios where respect was shown but we found it hard to actually put a meaning into words.  Here’s what we came up with:

Respect is feeling that something or someone is valuable and worthy of honour while at the same time showing this feeling by actions.

Both feeling and acting are required for respect.  Actions without feeling are not respect.  The statement “I respect you” is not respect when it is not lived out.

  • Respect God.  God is worthy of our words and actions.
  • Respect others. God created other people so we respect God by respecting others.
  • Respect yourself as one who has been created and loved by God.

While studying the bible character, Daniel, we explored the idea of respect.  In the story of the Writing on the Wall in Daniel chapter 5 King Belshazzer hosted a drunken party.  Instead of normal dishes he served food and wine in the special temple dishes used in worship to God.  His disrespect for God ended badly for the king.

During the party a mysterious hand appeared and wrote “Mene, Mene, Tekal, Parsin”.  The king was afraid and eventually Daniel was called in to interpret the words.  Daniel told Belshazzar that the king was arrogant and had insulted God. The words meant that Belshazzar’s time was finished.  He died that very night.

Here are some of the ideas we used for teaching this lesson:

Attributes of God Boxes:

2013 Coffs Harbour (21)

  1. Talk about some of the attributes of God with the children.  Each child should choose 2-4 attributes they feel are important to them and write (or draw) them on small white cards.  (Below is a list of attributes I found at http://www.josh.org/video-2/attributes-of-god/)
    1. Because God is a personal Spirit…I will seek intimate fellowship with Him.
    2. Because God is all-powerful…He can help me with anything.
    3. Because God is ever-present…He is always with me.
    4. Because God knows everything…I will go to Him with all my questions and concerns.
    5. Because God is sovereign…I will joyfully submit to His will.
    6. Because God is holy…I will devote myself to Him in purity, worship, and service.
    7. Because God is absolute truth…I will believe what He says and live accordingly.
    8. Because God is righteous…I will live by His standards.
    9. Because God is just…He will always treat me fairly.
    10. Because God is love…He is unconditionally committed to my well-being.
    11. Because God is merciful…He forgives me of my sins when I sincerely confess them.
    12. Because God is faithful…I will trust Him to always keep His promises.
    13. Because God never changes…My future is secure and eternal.
  2. Decorate small boxes and place the cards inside.  We used Chinese Take-out boxes but you could use any kind of box or bag.
  3. Guided Conversation: As the children are decorating the boxes the teacher can continue conversation about the various attributes of God and how these attributes lead to our respect for  him.

Group Wall:

2013 VBS Day 2 (14)

We assigned different letters to children and had them put them together to form the words “MENE MENE TEKEL PARSIN”.  No one knew beforehand what the letters were going to spell so the children had to put them together like a puzzle.

Application and Prayer Time:

  • Continue the earlier discussion and talk about how we should try to reflect the attributes of God in our personal lives.  Guide children in writing their name down the left side of the paper.  Beside each letter they should write something about God that starts with that letter (example below).
  • M- Merciful
    A- Artistic in His beautiful creation
    R- Righteous
    Y- Yes is yes and No is No (truthful)
    Encourage the children to circle one attribute that they would like to be better at.  Teacher should pray for the children one by one for the item circled.

Group Memory Verse:

1 Pet 2.17_1

The children will learn this verse together through repetition.  The challenge is to say the verse again and again even though an increasing number of words are covered up.

“Show proper respect to everyone.  Love the community of believers.  Have respect for God.  Honor the king.”   1 Peter 2:17   New International Reader’s Version (NIRV)

  • Print the verse on a paper before class.
  • Provide the children with scraps of paper and glue.
  • Place the printed verse on the table top and guide children in reading the verse together with you.
  • Child glues one of the small bits of paper over a word and then everyone says verse again.
  • The paper then passes to the next person so they cover another word.  Everyone recites the verse again.
  • One at a time cover word(s) and repeat until all words are covered and verse is memorised.

More resources for this story can be found at Writing on the Wall.