image_pdfimage_print

Never a Truer Word

Do you remember the first words you recognised when you began to read?  The three and four-year-olds that I teach are so pleased with themselves when they begin to realise that they can spell the word B-I-B-L-E.

We work on this skill for quite some time.  Each week we sing the B-I-B-L-E song.   I display the letters, and we point to each one as we sing it.  When I pick up my bible, I point out the letters and say them.

For a while, the children just mimic me.  I can tell that they have not quite figured it out.  Then, one day, it “clicks”.  That’s what happened this past Sunday.  For the first time, one of the children realised that those letters spell BIBLE!

We sang the song as usual, and he pointed to the letters.  But, this time, he then looked at me and said, “That says BIBLE!”.  He then looked all over our classroom, pointing out the word everywhere he saw it.  It was on each bible in the room.  It was on a room poster.  The word BIBLE was outlined on the bulletin board. He was so excited!

Recognising words as we read our Bible is another way of learning.  Pointing out and talking about words like “Jesus” and “forgive” can be life-changing.

I’m always looking for games that help children learn and are adaptable to any lesson. The Bible Wordz game is one of those.

In this adaptable game, children form words from letter tiles. The words relate to words found in the Bible lesson.  Thanks to Tamako Weiss for putting this game together for me.


Supplies:

  1. Individual letter tiles: Use tiles from games like Scrabble or Bananagrams.  Magnetic letters are another good choice. Alternatively, make your own from paper or bottlecaps.    You will need enough tiles to form multiple words
  2. Index cards or paper to create word cards
  3. A flat surface, like a table, on which to play
  4. (optional) 30-second timer
  5. (optional) Prizes.  These can be stickers, candy bars, bookmarks, or inexpensive toys

Preparations:

  1. Collect or prepare letter tiles.
  2. Create the word cards by writing a keyword on each card.

How to play:

  1. After telling the bible story, show students the keyword cards.  Take time to explain the meaning of each word.
  2. To begin the game, the students spread the tiles (face up) on the table surface.
  3. Set the timer for 30 seconds. When the time begins, students try to spell as many keywords as possible before the time is up.
  4. Students can use word grids or make the words individually.
  5. This can be done as a group or as a competition.  If competing, whoever spells the most words in 30 seconds wins.

Ways you can adapt this game:

  1. Ask the children to use a bible and choose the keywords on their own.  They can then create their own word cards and play the game.
  2. Use very simple words for younger children and more complex ones for older children.
  3. Use review questions instead of word cards.  Plan ahead so that you can ask questions that have one-word answers.  Ask the review question, and the students spell out the answer using the letter tiles.
    The following example is from the story Moses Does Not Honour God.
    Question: Who struck the rock twice?  Answer: Moses.
    The first child to guess and spell M-O-S-E-S wins the round.
  4. Skip the cards and timer and play straight from the Bible. Choose a set of verses and form as many words as possible from those verses.
  5. There are many ways you can adapt this game. Choose what is best for your class and students.

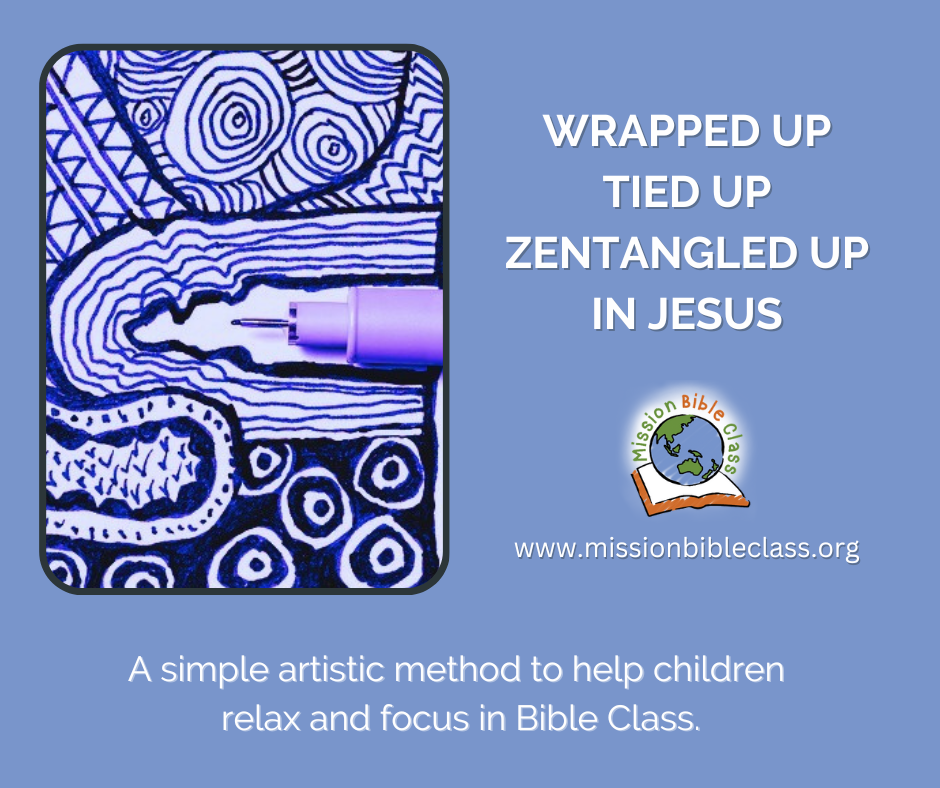
Wrapped Up, Tied Up and Zentangled Up in Jesus

Recently a group of children got me tangled up in something new.

I was teaching a small group of 9-12 year olds on Sunday mornings for Bible class.  I asked the children what ideas they had for helping us learn.   Their suggestions are what led us to begin “tangling” in Bible Class.

I had first been introduced to the idea quite some time ago but I had not thought of using it for my Bible class.  After learning a bit more about it I realised that the children were “on to something”.

Zentangle is a method of drawing that is so simple and repetetive that it frees your mind up to relax and focus. Doodling is more freeform and flowing but Zentangle usually follows patterns.

Don’t make the same mistake I did and think that Zentangle is somehow related to “Zen Buddhism”.   As I learned more I found out that it is actually an artistic method created by Rick Roberts and Maria Thomas.  They describe the actual process of drawing “tangling”.  They added the word “zen” to describe the calm effect tangling produces as you do it.
You can read more about how it began here.

How We Tangled in Our Class

Since we working our way through some great Old Testament lessons from the Tower of Babel all they way through the Life of Joseph I wanted to emphasise “FAITH”

Abraham, Isaac, Jacob and Joseph had great faith.

Here’s What We Did

  1. Prepared a Poster:
    The children could have draw their own letters but, for this first attempt, I decided to pre-print the word FAITH on a paper using big letter outlines.  I searched for a suitable font and found one similar to Janda Manitee Bubble .  Create your own or use this one in A4 size or this one in letter size (USA)
  2. Drew a free-flowing grid to create drawing spaces:
    The tangle designs can be done inside the letters or outside, in the white space.  I decided to go with the white space outside the letters.
    To help the children get started I went ahead and drew out a wavy sort of grid so they would immediately see the small areas to add designs to. By doing this free-hand I was able to create a totally unique pattern for each child.
  3. Provided each child with a pen:
    People take Zentangling to all sorts of levels and spend lots of money on special paper and pens.  In our case I just handed each child a fine line black pen.  We used fine line Sharpee pens.
  4. Started tangling:
    Each child selected a FAITH poster and began filling each of the “squares” with a unique design. As we all “tangled” we talked about faith. We weren’t about finishing the project by the end of class.  We just set them aside to be picked up and continued the next time we met.

What I learned about using Zentangle in Bible class

  1. Amazingly, this method really did bring calm to the classroom.
  2. Fidgeters stopped fidgetting and were able to draw and participate in conversation all at the same time.
  3. The conversation while tangling flowed naturally.  The children were relaxed and calm and just chatted about what faith meant in their lives and then about life in general. Even shy children contributed to the conversation since they did not feel undo attention was on them.
  4. I provided some patterns that I found online but the children in my class were quite happy to come up with their own designs.

Links to Videos and Patterns:

I wasn’t concerned with following strict guidelines for Zentanglel so I was able to find lots of patterns and examples online.  A simple online search for “zentangle” will lead you to a number of different examples.  Here are a few simple ones that I found.

And just for fun I’ll leave you with the song that I couldn’t get out of my head while writing this post!!

Lyrics:

I’m all wrapped up, all tied up, all tangled up in Jesus.
I’m all wrapped up, all tied up, all tangled up in God.
I’m all wrapped up, all tied up, all tangled up in Jesus.
I’m all wrapped up, all tied up, all tangled up in God.

Yes, This Counts at Home


The best lessons are not what goes on in my Bible class.  The best lessons are what the children take with them when they leave.

Years ago I was teaching children about the Fruit of the Spirit.  One young child was in total agreement with love, joy, peace, patience, kindness, goodness and faithfulness.  These were great concepts and he loved learning about them and exploring how they apply in church and in school and with his friends.  But I’ll never forget his reaction when I mentioned that the Fruit of the Spirit should also be displayed to our brothers and sisters in our family.

This young man, moments before, had been enthusiastic when talking about these concepts in various other settings.  Now, he looked at me in shock and horror and said, “What! This counts at HOME too?”

This child realised a truth that is for all of us.  It is God’s intention that we apply what we learn to ALL parts of our lives.

Prayer Cards are one way to help children understand this important truth.

I was able to use these recently when teaching about Joseph’s brothers selling him into slavery.  As we explored the tense relationship between Joseph and his brothers I asked the children in my class to consider relationships with their own siblings.  Even if we do not always get along we should want the best for them.  One way to do this is to pray for them.

I supplied paper, scissors and pens.  As we talked about our siblings we wrote their names on cards.  In class we prayed for each one.  Then, the children took the cards home so they could remember to pray for their siblings.

Yes, prayer counts at home, too.

Full instructions for prayer cards


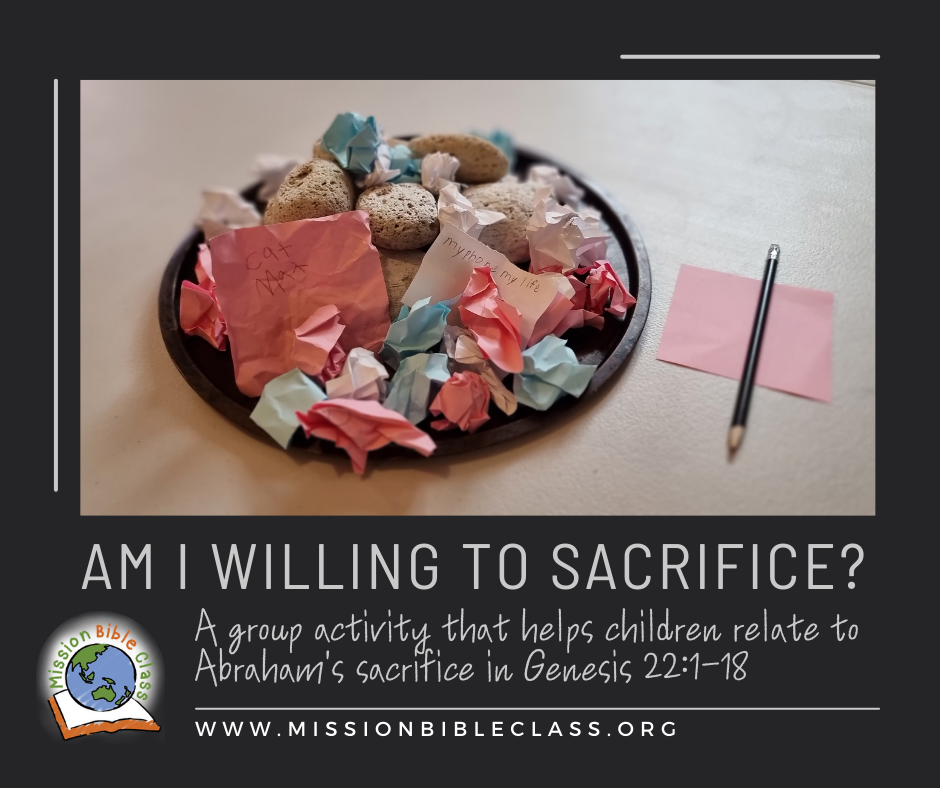
Am I Willing to Sacrifice?

Some stories in the Bible lend themselves to crafts and colouring sheets.  This is not one of them.

There is no way to lightly depict a father being asked to kill and sacrifice his precious son.  The story of Abraham Preparing to Sacrifice His Son is a test of faith like no other.

Of course, even as Abraham was about to carry through with what God had told him to do, an angel intervened and stopped him.  Yes, Abraham had reasoned that God would not ask this unless he planned to bring his son, Isaac, back from the dead after the sacrifice (Hebrews 11:17-19).  But even so, there was a father and a son and a knife.

As difficult it is to comprehend the events of Genesis 22:1-18  they are only a foreshadowing of another time, later in history, when another father allows his son to be sacrificed on a cross.

I wanted the children in my Bible class to contemplate sacrifice.  I wanted them to think about what it would mean to love and trust God so much that we would be willing to give up something we hold precious.  Abraham passed the test and showed he was willing to go to any extreme God asked of him.  Would we pass that test?

The following activity meant a lot to my group of kids so I thought you might like to try it too.  Like Abraham, they will be taken to the very edge in contemplating sacrifice but then they will not actually be sacrificing.

I would suggest you speak calmly and not too fast so that you create an environment of contemplation among the children.

Supplies you will need:

  • Enough paper so that each child will have a few small sheets of paper
  • Pens or pencils
  • Some flat stones
  • Something upon which to place the stones (I used a round metal pizza pan)
  • An empty box of matches

Instructions:

After telling the story of Abraham and Isaac further discuss how God was more important to Abraham than anything or anyone.  Abraham proved that he was willing to sacrifice even the most important thing in his life, his son.  Is God that precious to us?  What would we be willing to sacrifice if we were tested?

  1. Have the children write or draw what is important or precious to them on small pieces of paper.  One item on each piece of paper.  As they write you can already begin asking them whether the thing written on their paper is as important as God.  Keep in mind that this is not about good or bad.  They will be writing down some very good things and people.  This is about whether or not God is more important than even the MOST precious things.
  2. After they have written for a little while then bring out the stones and stack them together to form an altar.  My class was sitting at a table so I placed the stones on the metal pizza pan in the centre of the table.  The children immediately recognised it was an altar.
  3. Now ask the children to think carefully about what they have written on their papers and whether or not they would be willing to give them up (sacrifice them) if God asked them to.
    If they are willing to give it up then have them scrunch up the piece of paper and place it on the altar. Don’t rush this.  Allow them to really consider. More than one child in my class was not ready to “sacrifice” what they had written but, after some thought, bravely decided to do so.  When they place something on the altar be sure and tell them you understand how difficult it is and are proud they have made that decision.  After all, sacrifice is difficult for children just like it is difficult for us adults!
  4. Once the papers are all on the “altar” then bring out the matchbox.  When you seem to be ready to burn all of these sacrifices then open the matchbox to show that it is empty.

At this point continue the conversation to relate the activity back to Abraham.  Here is what I said, “Of course we are not going to burn all of these things.  God wants us to enjoy all of these blessings in our lives.  After all, many of these people and things are very good for us and he does not want us to give them up.

But God DOES want us to understand that HE is more important than even the best things in our lives.  Isaac was the best thing in Abraham’s life but Abraham’s willingness to sacrifice him showed that God was even more important than his beloved son.

In today’s bible lesson we learn that God tested Abraham to see if he was willing to give up Isaac if it was for God.  Abraham passed the test.

And guess what?  Today we have had a kind of test.  YOU were willing to give up your precious things if it was for God.  You showed that God is more important than all of these things.  You passed the test. I am so proud of you.”

At the conclusion of the activity I prayed out loud for each child individually.


I Say L.O.V.E

Have you ever had a song stick in your head and refuse to go away?   This week a friend of mine shared a song with me that has done exactly that.

The song is not fancy.  It only has six words.  It is a teacher training video and not a performance for the Grammy Awards.   Even so, it is stuck in my mind like glue.  Listen a few times and I dare you to forget it.

Everybody needs some love.

Lyrics:

I say L
I say L-O
L-O-V
L-O-V-E

Everybody needs some love.  L-O-V-E!

Everybody needs some love.  L-O-V-E!

Everybody needs some love.  L-O-V-E!

Everybody needs some love.


For more songs and free teaching resources visit Mission Bible Class